How To...

This page begins a how-to section documenting the procedures of restoring the Scorpion. This section will cover the proper technique of repairing rust.
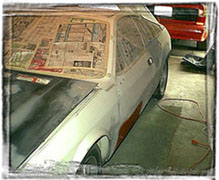
Even though the Scorpion had spent the first two decades of its life in the arid southwest, the car still managed to develop a few localized areas of rust. This is very common for these cars, and each car will have rust in these problem zones regardless of how well the car was taken care of.
Continue reading below as we gather ther tools and supplies needed to get started repairing the localized rust hole on the bottom of the drivers door.
- Tools needed:
- Electric grinder
- Sheetmetal snips
- Welder
- Vise Grip locking pliers®
- Assorted metalworking tools:
- Hammers
- medium ball peen
- body-contouring
- chisel
- vise
- pliers
- Supplies needed:
- Sheetmetal 18ga recommended
- Rust converter / inhibitor
The work begins...
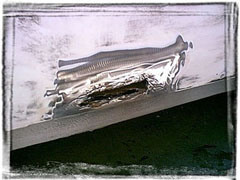
- The first thing we will do is start removing the rust. Note: you need to remove all of the rusted metal in order to keep it from coming back down the road. Using the electric grinder, work from the center of the rusted area until you reach clean metal around the perimeter of the hole. Its easiest to grind yourself a square or rectangular area as it will be easier to fabricate the metal patch.
- Once you are certain that you have removed the rust and have clean metal exposed you can do some final shaping of the hole, as well as create a lip for the patch to fit in. For this use the hammer, chisel, and pliers. The chisel is used when shaping your corners, the grinder has a round disk so it will be difficult to get uniform corners. After you have nice defined corners, using the pliers, begin forming a recessed lip around the edge of the area to be patched. This will be the area the metal patch will rest in so you will have a flush patch that will not be recognised once the area is refinished.
- Now its time to fabricate the patch. Measure the size of the area which you are filling, often the use of a cardboard template will be very helpful. Trace the measurements or template on to your new sheetmetal, then cut out the patch with the snips. If there are any contours in the body of the car where you are placing the patch you should form them now by using the contour hammer and block of wood, or a bag of sand.
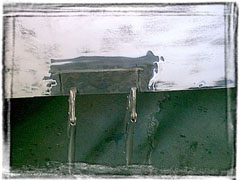
- Test fit the patch to verify the shape and size are correct. If everything looks satisfactory you may now clamp the patch in place to be welded. Use the Vise Grips® to secure the patch. With the patch in place you may now begin to tack-in the patch using the welder. Its recommended to weld very small areas at a time to keep from overheating the affected area. Over-heating the area may distort the metal and cause it to permanently change shape.
- With the welding complete, you can touch up any areas which may have elevated lumps of excess welding material. To do this you will use the electric grinder to remove the high spots. After everything has cooled you should clean the area with a solvent to prepare the area for the rust inhibitor. Its important to use rust inhibitor anywhere the surface was taken down to bare metal during the above processes, you want your hard work protected from future rust.
 Return to Top